
Underfloor heating installation is rapidly transforming how we heat our homes, setting a new benchmark for energy efficiency and comfort in 2025. As technology evolves and regulations tighten, more homeowners and professionals are turning to this innovative solution.
This guide breaks down every aspect of underfloor heating installation, from the initial planning stages through to post-installation care. Whether you are renovating, building new, or simply looking to upgrade, our expert insights will ensure you make informed decisions at every step.
You will discover the different system types, preparation essentials, step-by-step installation, technical tips, cost analysis, and maintenance strategies. Ready to future-proof your property and enjoy a seamless, efficient heating solution? Let’s get started.
Understanding Underfloor Heating Systems
Underfloor heating installation is transforming the way we heat our homes in 2025. Homeowners and professionals alike are turning to these systems for improved efficiency, comfort, and sustainability. Understanding the fundamentals of underfloor heating systems is essential before making any decisions or starting the installation process.
Types of Underfloor Heating
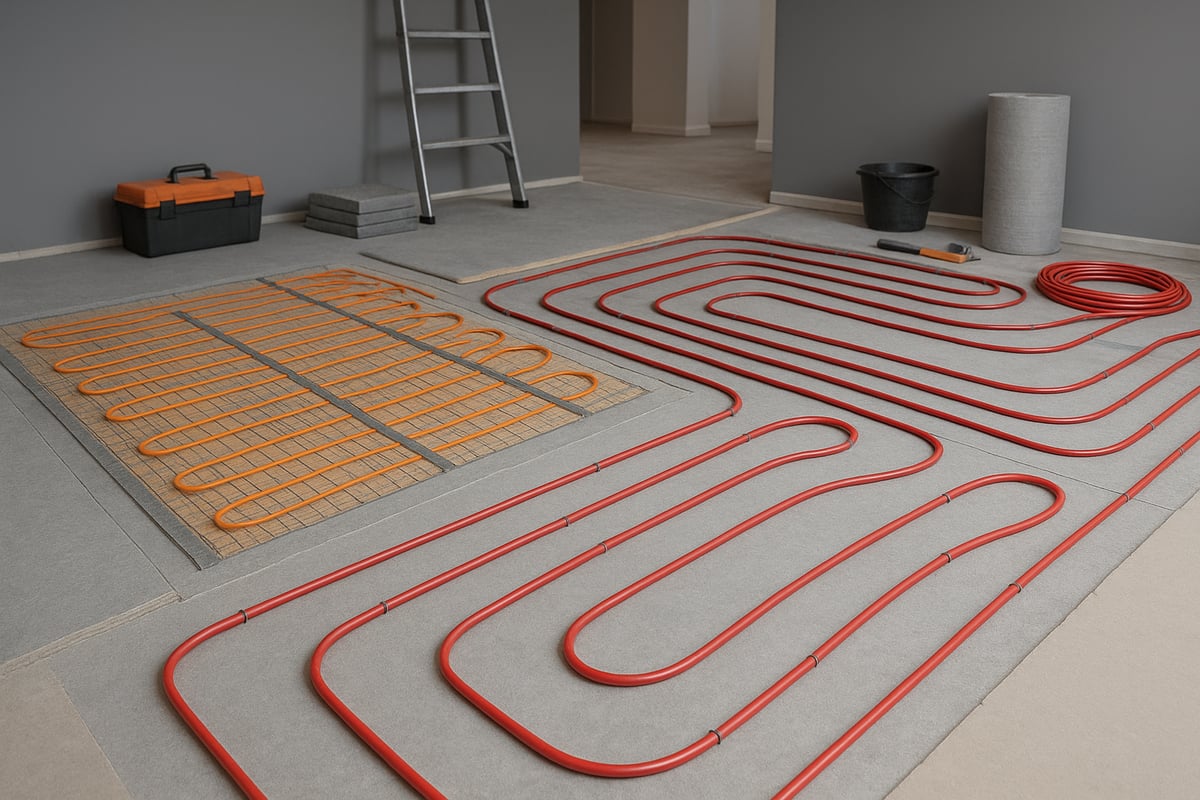
There are two main types of underfloor heating installation: electric and water-based (hydronic) systems. Each has its strengths and is suited to specific settings.
| System Type | Pros | Cons | Best For |
|---|---|---|---|
| Electric | Quick to install, ideal for small areas | Higher running costs, less efficient | Bathrooms, en-suites, retrofits |
| Hydronic | Lower running costs, scalable | Higher upfront cost, longer install | Large spaces, new builds |
Electric mats are great for small bathrooms or renovations, while hydronic pipes work best in open-plan living areas. In 2024, hydronic systems made up 60% of new underfloor heating installation projects in the UK, highlighting their growing popularity for larger homes and energy-conscious buyers.
How Underfloor Heating Works
Underfloor heating installation relies on radiant heat, providing warmth directly through the floor rather than heating the air as radiators do. The system consists of several key layers: high-quality insulation, the heating element (either electric mats or hydronic pipes), a screed or self-levelling compound, and the final floor covering.
This layered construction ensures heat is distributed evenly, improving comfort and indoor air quality. For a detailed breakdown of the floor layers and construction process, see Underfloor heating floor construction. Proper planning of these layers is vital for a successful underfloor heating installation.
Energy Efficiency and Environmental Impact
Underfloor heating installation is significantly more energy efficient than traditional radiators. According to the Energy Saving Trust, these systems can cut energy use by up to 25%. They work exceptionally well with modern heat pumps and renewable energy sources, helping to reduce your home's carbon footprint.
With the 2025 building regulations pushing for higher efficiency, underfloor heating installation is an excellent way to future-proof your property and lower ongoing energy costs.
Key Benefits and Limitations
The main benefits of underfloor heating installation include even heat distribution, freeing up wall space, and reducing allergens due to less air movement. However, there are considerations to keep in mind: installation can be complex, floor height may increase, and upfront costs can be higher than radiator systems.
Recent UK case studies show that homeowners have cut their heating bills by 30% after a professional underfloor heating installation. Balancing these advantages with practical limitations will help you decide if this modern solution is right for your home.
Pre-Installation Planning and Preparation
Embarking on an underfloor heating installation project begins long before any pipes or cables are laid. Careful planning and thorough preparation are essential to achieving an efficient, hassle-free system that stands the test of time. Let’s break down the crucial steps every homeowner or professional should follow.
Site Survey and Suitability Assessment
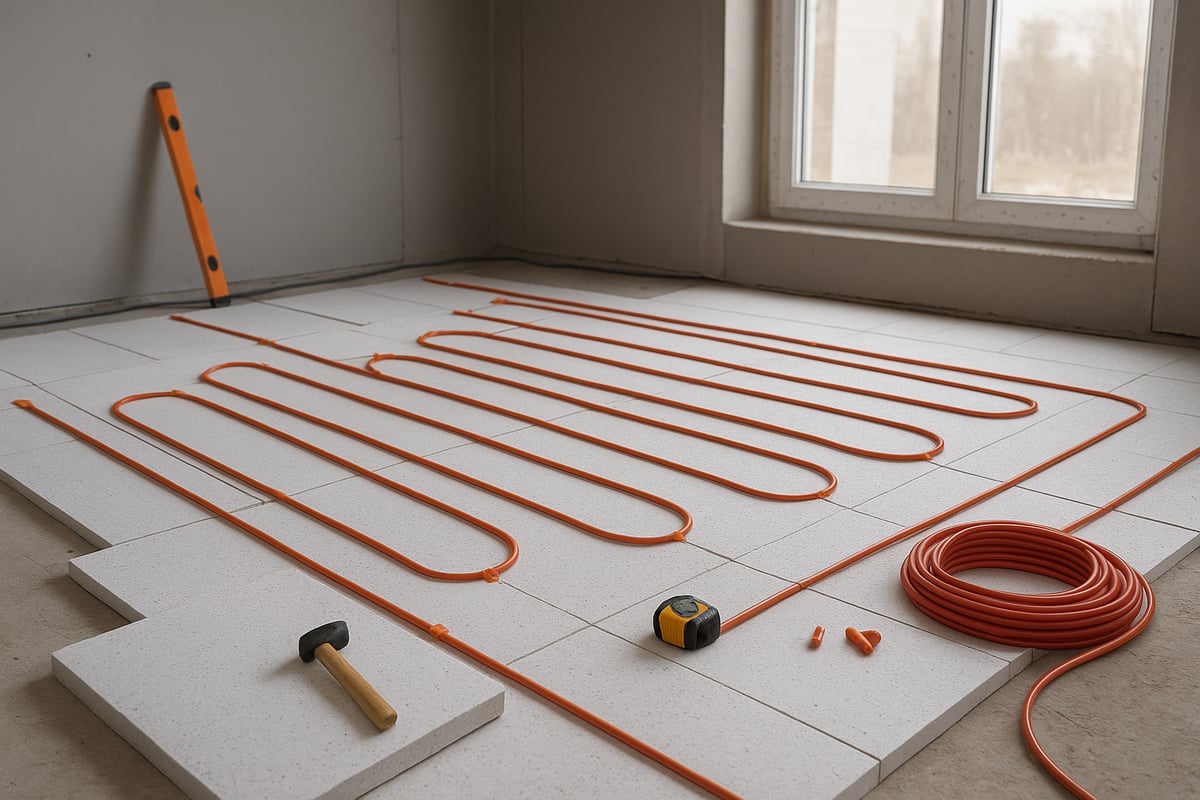
The first step in any underfloor heating installation is a comprehensive site survey. Assess the subfloor type — concrete, timber, or suspended — as this affects system compatibility and installation method. Check for adequate insulation, as heat loss through the subfloor can drastically reduce efficiency.
Identify obstacles such as joists, existing wiring, and potential damp issues. Pinpointing these early prevents unexpected delays. Accurate heat loss calculations are vital at this stage. They ensure the chosen system will deliver the required comfort and performance, avoiding underpowered or oversized setups.
A well-executed survey sets the foundation for a successful underfloor heating installation by eliminating surprises and informing every subsequent decision.
Selecting the Right System for Your Home
Choosing the optimal system is critical for a smooth underfloor heating installation. Match the system type to each room’s function and floor covering. Electric systems are ideal for smaller areas like en-suite bathrooms, while hydronic systems suit open-plan living spaces or whole-house solutions.
Consider room size, ceiling height, and insulation levels when making your decision. For example, hydronic systems excel in large, well-insulated zones, whereas electric mats offer rapid response in compact spaces. Consult manufacturer guidelines and key underfloor heating components to ensure compatibility and optimal performance.
Careful selection at this stage guarantees a tailored underfloor heating installation that meets both comfort and efficiency goals.
Regulatory and Building Code Considerations
Compliance with UK building regulations is non-negotiable for any underfloor heating installation. The 2025 standards, particularly Part L, prioritise energy efficiency and low-carbon solutions. All electrical connections must adhere to the latest IET Wiring Regulations (BS 7671) for safety.
Ensure you have the correct certifications, such as NICEIC or Gas Safe, depending on the system installed. Keep detailed records and paperwork, which may be required for building control sign-off or future property sales.
Staying informed on current regulations and documentation requirements protects your investment and ensures a legally compliant underfloor heating installation.
Cost Analysis and Budgeting
Understanding the financial aspects of underfloor heating installation is essential. Costs can vary significantly depending on system type, property location, and labour rates. Factor in materials, installation, and advanced controls, as well as future running costs and potential savings.
| Cost Factor | Typical Range (2024, North East UK) |
|---|---|
| Materials (per m²) | £35 – £50 |
| Labour (per m²) | £30 – £45 |
| Controls/Smart Tech | £100 – £400 |
| Total (avg. per m²) | £65 – £95 |
Proper budgeting ensures your underfloor heating installation remains on track and delivers long-term value.
Timeline and Project Planning
A clear project timeline is crucial for a successful underfloor heating installation. New builds typically allow for more flexibility, with installation taking place before floor coverings. Retrofits may require additional time for removing existing floors and resolving unforeseen issues.
Coordinate with other trades, such as electricians and floor installers, to avoid scheduling conflicts. Allow for drying or curing times, especially when using screed, as rushing this phase can compromise system performance.
Effective planning minimises disruption, keeps your underfloor heating installation on schedule, and ensures every stage is executed to the highest standard.
Step-by-Step Underfloor Heating Installation Process
Embarking on an underfloor heating installation requires methodical planning and attention to detail at every phase. Whether you are a homeowner or a professional installer, following a systematic approach ensures optimal performance, efficiency, and long-term reliability. In this section, we break down the process into practical, manageable steps, guiding you through preparation, setup, and commissioning.
Subfloor Preparation and Insulation
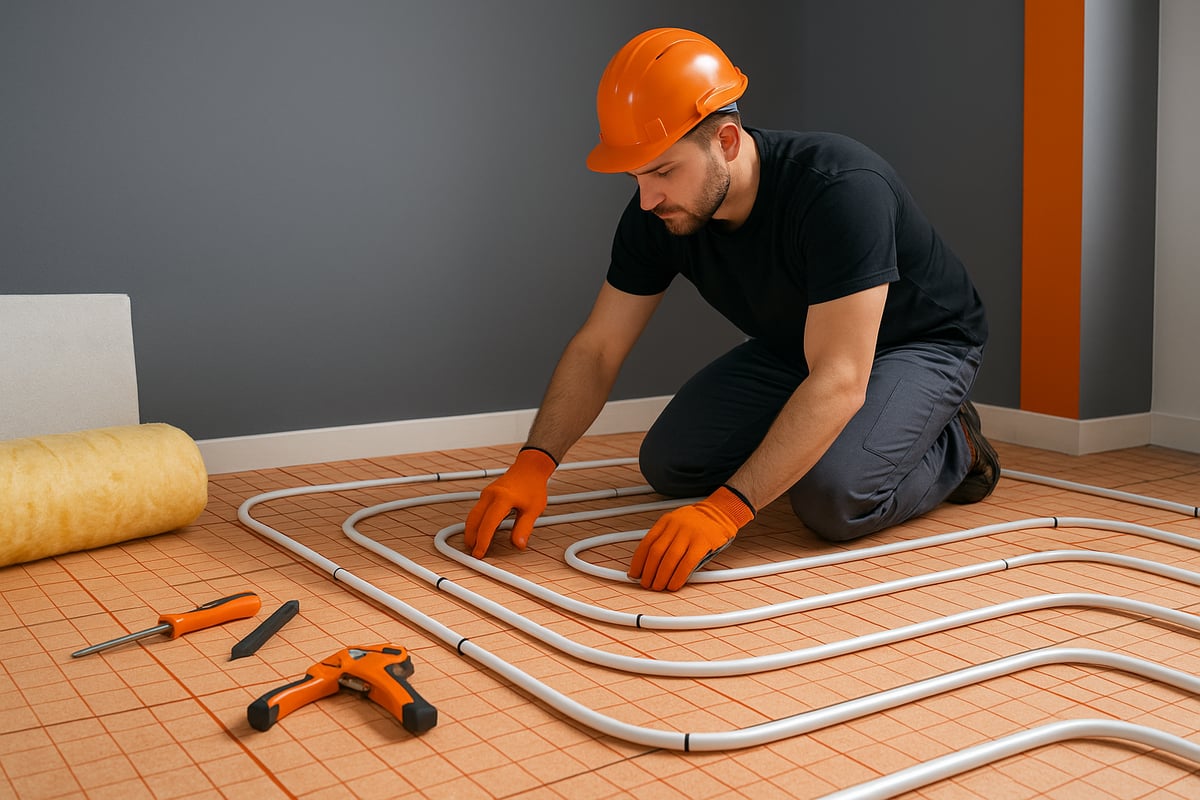
Every successful underfloor heating installation begins with proper subfloor preparation. Start by thoroughly cleaning and levelling the subfloor to remove debris, dust, and any previous floor coverings. This step is crucial for achieving an even heat distribution and maximising the lifespan of your system.
Inspect the subfloor for any cracks or structural issues. Repairing imperfections at this stage prevents future problems and supports the insulation layer. Next, install high-quality insulation boards. These boards act as a thermal barrier, significantly reducing heat loss to the ground below.
Damp-proof membranes or vapour barriers are essential in areas prone to moisture, such as ground floors and basements. Their use protects both the heating system and the property structure. Skipping insulation can lead to up to 30% efficiency loss, so do not overlook this step.
A well-prepared subfloor is the foundation of an efficient underfloor heating installation. Always follow manufacturer recommendations for insulation thickness and material compatibility to ensure compliance and long-term performance.
Laying Out the Heating System
Once the subfloor is ready, plan the layout for the heating pipes or electric mats. Use a floor plan to mark out the optimal route, ensuring complete and even heat coverage. Avoid placing heating elements under fixed furniture or kitchen units, as this can cause overheating or reduce system efficiency.
Adhere strictly to the manufacturer's spacing guidelines, typically ranging from 100mm to 200mm between pipes or cables. Proper spacing prevents cold spots and ensures balanced heating throughout the room. For tricky spaces like bathrooms, consult expert bathroom underfloor heating advice to address unique challenges such as waterproofing and tight layouts.
Use fixing systems, such as clips, rails, or mesh, to secure pipes or mats in place. This reduces movement during screeding and guarantees correct positioning. Careful planning at this stage is vital for a smooth underfloor heating installation and helps avoid costly alterations later.
Connecting and Securing Components
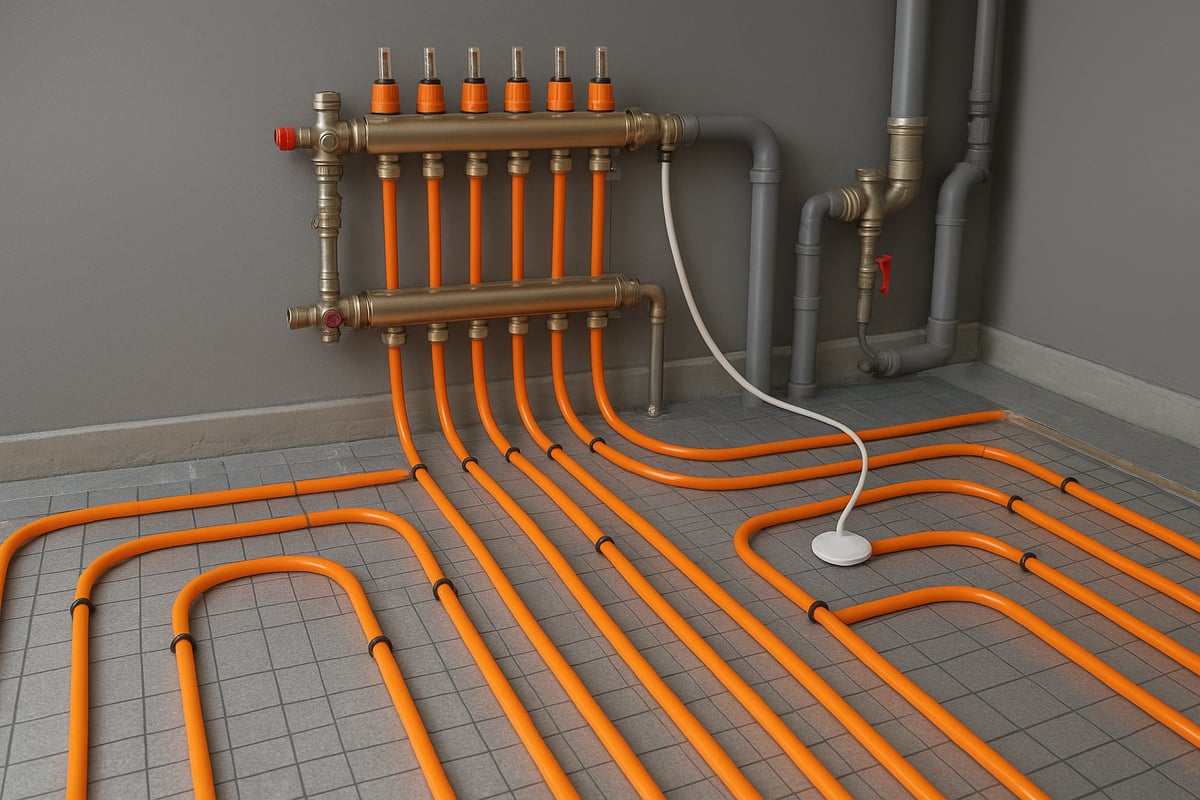
With the heating system laid out, the next step in your underfloor heating installation is connecting all components safely and securely. For hydronic systems, this involves fixing the pipes to the manifold, while electric systems require connection to a dedicated wiring centre.
Double-check all pipe and cable runs for tension and secure them firmly to the subfloor or insulation boards. Pressure testing is mandatory for hydronic systems before screeding. Fill the pipes with water and check for leaks using a pressure gauge. This step ensures system integrity and prevents future water damage.
Common mistakes during this phase include inadequate connection tightness, missed leaks, or incorrect wiring. Always consult the manufacturer’s instructions and, if in doubt, seek professional advice. Properly secured and tested components are the backbone of a reliable underfloor heating installation.
Installing Floor Sensors and Controls
Accurate temperature regulation is essential for comfort and efficiency in any underfloor heating installation. Position floor temperature sensors and thermostats according to the system design. Place sensors in areas least likely to be affected by drafts or direct sunlight to ensure consistent readings.
Modern systems often integrate with smart home controls and zoning, allowing for tailored heating in different areas. Make use of programmable thermostats to set heating schedules that match your lifestyle, further improving energy efficiency.
Wiring should be routed through conduits and terminated safely in accessible locations. If integrating with a broader home automation system, now is the time to connect those interfaces. Proper installation and calibration of sensors and controls make a noticeable difference in system performance and user comfort.
Screeding and Floor Covering Installation
After installing controls, it is time to cover the heating system. For most systems, pour a screed or apply a self-levelling compound to embed the pipes or mats. The screed should be of the recommended thickness, typically between 50mm and 70mm for hydronic systems.
Allow ample time for curing or drying. Rushing this step can lead to cracks or uneven surfaces, which may compromise the underfloor heating installation. Once the screed is fully cured, proceed with your chosen floor covering. Suitable options include ceramic tile, laminate, engineered wood, or even carpet with a compatible underlay.
Problems often arise when the screed is not given enough time to set. Always refer to drying times provided by the screed manufacturer and factor in ambient temperature and humidity. Properly finished flooring ensures both the efficiency and durability of your heating system.
System Commissioning and Initial Testing
The final phase of underfloor heating installation is commissioning and testing. Begin with comprehensive system checks, including pressure (for hydronic systems), electrical continuity, and insulation resistance (for electric systems).
Initiate the first heating cycle gradually, increasing the temperature over several days. This prevents thermal shock and reduces the risk of screed cracking. Monitor all zones for even heat distribution and confirm that thermostats and sensors respond as expected.
Record system performance data for warranty and compliance purposes. This documentation is valuable for future maintenance or if issues arise. A thorough commissioning process ensures your underfloor heating installation operates safely, efficiently, and in line with manufacturer and regulatory standards.
Technical Considerations and Common Challenges
Modern underfloor heating installation offers superior comfort, but technical challenges can arise. Proactively addressing these ensures both performance and longevity. Let us explore the key considerations and obstacles you might encounter.
Floor Construction and Height Build-Up
Floor height increase is a common concern in underfloor heating installation. Adding new layers, such as insulation boards and screed, can raise finished floor levels by 30mm or more. This impacts door thresholds, skirting, and transitions between rooms.
To minimise build-up, low-profile systems are available. These use thinner insulation and slimline heating elements. This solution is especially valuable for retrofitting underfloor heating installation in Victorian terraces, where ceiling heights and existing features are fixed.
Always measure final heights during planning. Adjust doors and trims as needed. This ensures a seamless look and maintains accessibility throughout the property.
Electrical and Plumbing Integration
A successful underfloor heating installation depends on precise integration with electrical and plumbing systems. All water pipes and electrical cables must be routed safely, avoiding sharp bends and potential pinch points. This reduces the risk of damage during and after installation.
Coordination with electricians and plumbers is vital. For electric systems, compliance with IET Wiring Regulations (BS 7671) is mandatory. For hydronic systems, proper manifold placement and leak-free joints are essential.
Early collaboration prevents costly errors. Always use certified professionals for electrical and plumbing work within your underfloor heating installation project.
Dealing with Unusual Room Shapes and Obstacles
Not all rooms are simple rectangles. Underfloor heating installation in spaces with bay windows, alcoves, or irregular layouts requires custom planning. Mapping out pipe or mat routes to cover every zone is crucial for even heat distribution.
Obstacles such as kitchen islands or fixed furniture can disrupt heat flow. In these cases, installers may use zoning—separating areas into independently controlled circuits. This approach is effective for open-plan living spaces with multiple uses.
Careful layout design ensures every corner benefits from your underfloor heating installation, maximising comfort and efficiency.
Troubleshooting Installation Issues
Even with expert planning, issues can emerge during underfloor heating installation. Cold spots often result from poor insulation or airlocks in hydronic systems. Uneven heating may point to incorrect pipe spacing or damaged mats.
Diagnostic tools, such as thermal imaging cameras and pressure testers, help identify faults quickly. Common installation errors include failing to pressure test hydronic circuits or improper wiring connections.
Prompt troubleshooting protects your investment. Address problems early to ensure your underfloor heating installation delivers optimal performance for years to come.
Upgrading and Integrating with Existing Heating Systems
Many UK homes combine underfloor heating installation with traditional radiators. This hybrid approach allows for targeted comfort and flexibility. Integration with existing boilers, heat pumps, and smart controls is increasingly popular, enabling phased upgrades in period properties.
When planning integration, consider zoning, control compatibility, and pipework modifications. For more detailed guidance, see this resource on combining underfloor heating and radiators.
A well-designed hybrid system future-proofs your home, ensuring your underfloor heating installation remains efficient and adaptable as technologies evolve.
Cost, Value, and ROI in 2025
Installation and Running Costs
The financial side of underfloor heating installation is a key consideration for homeowners in 2025. Initial costs vary depending on system type, property size, and regional labour rates. On average, electric systems cost between £50 and £75 per square metre installed, while hydronic systems range from £80 to £120 per square metre.
Labour charges differ across the UK, with higher rates in London and the South East. Material quality, complexity, and chosen controls can further influence the final bill. DIY installation may reduce upfront expenses, but professional fitting ensures compliance and system longevity.
A cost comparison table can help:
| System Type | Average Cost (per m²) | Typical Labour (per day) |
|---|---|---|
| Electric | £50–£75 | £150–£250 |
| Hydronic | £80–£120 | £200–£350 |
Factoring in running costs, electric systems are typically more expensive to operate, but both options offer significant energy savings over time. Underfloor heating installation costs should always be weighed against long-term value.
Long-Term Energy Savings and Payback
One of the strongest arguments for underfloor heating installation is its impact on energy efficiency. Households can expect annual heating bill reductions of 20 to 30 percent, particularly when systems are paired with smart thermostats and zoning controls. The exact payback period depends on the system type, property insulation, and energy tariffs, but most homeowners see a return on investment within 7 to 10 years.
The Energy efficiency of housing in England and Wales report highlights how modern heating solutions, such as underfloor heating installation, help properties achieve higher EPC ratings and support the UK’s drive toward net zero.
Smart controls further optimise consumption, allowing users to fine-tune temperature settings by room and schedule. This technology not only maximises comfort but also contributes to lower running costs.
Property Value and Market Appeal
Underfloor heating installation is increasingly seen as a premium feature in the UK property market. In 2025, buyers actively seek out homes with energy-efficient upgrades, and underfloor heating consistently ranks among the most requested amenities. Recent surveys show that over 40 percent of UK buyers consider underfloor heating a significant selling point.
Properties with this feature often command higher asking prices and attract more interest, especially in new builds and modern renovations. Estate agents report that listings advertising underfloor heating installation experience faster sales and increased viewing numbers.
For example, a recent London flat equipped with hydronic underfloor heating sold for 8 percent above comparable properties without this upgrade. The long-term appeal of this system makes it a wise investment for future resale.
Grants, Incentives, and Financing Options
The cost of underfloor heating installation can be offset by a range of UK government grants and incentives. In 2025, schemes like the Boiler Upgrade Scheme and local council support continue to promote energy-efficient improvements. Many installers now offer 0 percent financing and flexible payment plans, making advanced heating solutions accessible to more households.
According to the English Housing Survey 2023 to 2024: Low Carbon Technologies, uptake of underfloor heating installation is highest in regions where incentives are actively promoted. In the North East, for example, homeowners are spreading installation costs over several years, ensuring affordability without compromising on quality or efficiency.
Homeowners are encouraged to explore all available options and consult with certified installers to maximise their investment.
Maintenance, Troubleshooting, and Future-Proofing
Regular maintenance is essential to maximise the performance and lifespan of any underfloor heating installation. By following expert advice, you can prevent common issues, optimise efficiency, and ensure your system remains compliant and future-ready. Below, we break down the most important steps for care, troubleshooting, upgrading, and preparing for the years ahead.
Routine Maintenance and Care Tips
Maintaining your underfloor heating installation ensures consistent comfort and efficiency. Annual checks are recommended for both electric and hydronic systems.
- Inspect system pressure for hydronic setups, topping up as needed.
- Calibrate thermostats and test sensor accuracy.
- Clean manifolds and remove air from the system to prevent airlocks.
Manufacturers often suggest a maintenance schedule tailored to your system type. For example, hydronic systems benefit from periodic limescale treatment, especially in hard water areas. Simple steps like keeping controls dust-free and monitoring energy consumption can help spot issues early. Consistent upkeep will protect your investment and keep your home cosy year-round.
Troubleshooting Common Problems
Even the best underfloor heating installation can encounter problems over time. Common issues include cold spots, uneven heating, or unresponsive controls.
Start by checking the thermostat settings and ensuring all circuit breakers are on. For hydronic systems, look for airlocks and bleed the pipes if necessary. Electrical faults may require inspecting wiring connections or continuity with a multimeter.
If you notice leaks or persistent cold areas, it may indicate a more complex issue. Use diagnostic tools like infrared thermometers to identify uneven heat distribution. Many minor problems can be resolved with basic troubleshooting, but persistent faults may need professional attention.
Upgrading Controls and Smart Integration
Modernising your underfloor heating installation with smart controls offers significant benefits. Upgrading to app-based thermostats or zoning systems allows for precise management of temperatures in different rooms.
- Smart thermostats adapt to your daily schedule, reducing wasted energy.
- Zoning enables independent control of living areas, bedrooms, and bathrooms.
- Remote access lets you adjust settings from anywhere.
Retrofitting older systems is usually straightforward, especially with wireless options. Case studies from 2024 show that smart zoning can boost energy savings by up to 20 percent. Investing in advanced controls not only improves comfort but also increases the value of your heating solution.
Ensuring System Longevity
To maximise the lifespan of your underfloor heating installation, follow best practices recommended by manufacturers. Schedule professional servicing at intervals specified in your warranty, often every 1–2 years for hydronic systems.
- Use quality materials and approved components during installation.
- Monitor water quality to prevent corrosion and limescale build-up.
- Record all maintenance and repairs for warranty compliance.
A well-maintained system can last over 25 years, especially if you address minor issues promptly. Remember, regular attention to your system’s health will ensure reliable performance and long-term savings.
Preparing for Future Regulations and Technologies
The landscape for underfloor heating installation is evolving, with new regulations and technologies on the horizon. The 2025 building regulations in the UK emphasise energy efficiency and integration with renewables.
To future-proof your system:
- Choose components compatible with solar panels or battery storage.
- Stay informed about compliance requirements and documentation.
- Consider designs that can adapt to changing insulation standards.
For a comprehensive overview of the latest energy efficiency measures and regulatory updates, review the Household Energy Efficiency Statistical Release March 2025. Proactive planning ensures your underfloor heating installation remains compliant and efficient for years to come.
When to Seek Professional Help
While many aspects of underfloor heating installation and upkeep can be managed by homeowners, certain situations require expert intervention.
- Signs of persistent leaks or pressure loss in hydronic systems
- Electrical faults or tripped breakers that cannot be resolved
- Unusual noises, odours, or rapid temperature fluctuations
Always choose certified installers and service providers for repairs or major upgrades. Professional maintenance contracts offer peace of mind and ensure your system operates safely and efficiently. Seeking help at the right time can prevent costly damage and extend your system’s lifespan.